When Simpler is Better-Create a Reverse Stencil for Valentine's Day

Sometimes, simpler is just better...especially when you are first learning something new. That's why I love creating signs with reverse stencils. It is such a simple concept. Take any shape or silhouette cut image on design space like a heart, shamrock, cupcake, daisy, etc. and cut a stencil with your Cricut using 631 oracal removable vinyl.
In my example, I just painted a board with stripes using various chalk paint colors and some tape.
Next, instead of using the stencil part of the vinyl, you just remove the inside shape of the vinyl and apply it to any background that you've painted. Next, paint over that with a contrasting color (I chose white) and viola! You've got a diy sign which is especially exciting when you are first learning because that immediate gratification is often what will give you the confidence to do another project and on and on that goes until you're obsessed with how fun the process is and you're barely thinking about what steps you need to do to creat...
4 Reasons Your Stenciled Sign Didn't Turn Out How You Hoped
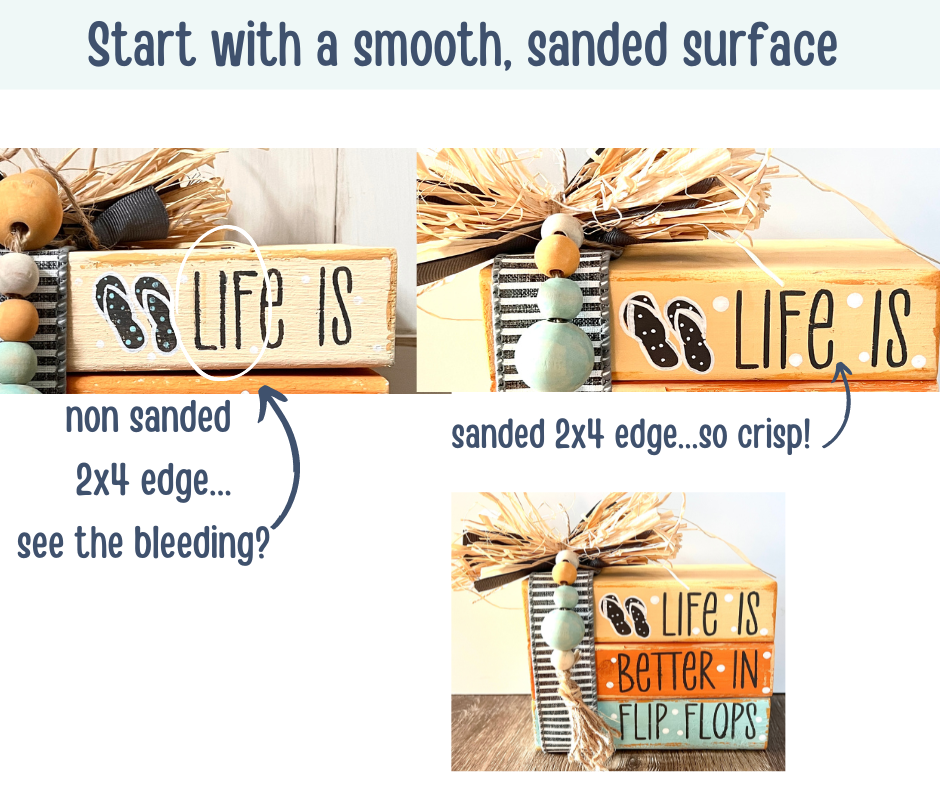
Are you trying to create beautiful signs with your Cricut but keep getting bleeding under your stencils? You are not alone! There’s nothing more frustrating than working really hard on a sign project using vinyl, stencil vinyl, or mylar, and then getting finished and seeing that you have lots of bleeding and touch ups to do. Today I’m sharing the four main reasons that you’re getting bleeding under your stencils and what you can do to prevent it!
- The surface is too bumpy.
If you are just starting out with sign making and want to be successful right out of the gate, it’s really important that you start with a piece of wood that is pretty smooth in general. If you do find yourself creating a sign on a slightly bumpy surface, keep reading to learn how you can still avoid the bleeding.

- You’re using the wrong type of vinyl.
A common mistake beginners make is choosing Cricut stencil vinyl because they think, “I have a Cricut, and I want to make a stencil.” Makes sense right...
